CPRNM® is a comprehensive directory designed to connect individuals and employers with top-tier training
providers including the AHA®, Red Cross®, and other training providers.*
 November 2, 2017
 If you are like most people, you have a stock of supplies in your closet or cabinet. It might contain, aspirin, allergy medication, band-aids and peroxide. Pack rats who don’t like to run out probably have a few places to store backups. You never know when you will need a certain item, after all. This is all well and good if someone trips and cuts open their knee in the driveway, but what do you do when you need portable first aid?
You can buy expensive, fancy first aid kits that are nicely packaged, but why break your budget when you can build your own DIY first aid kit, tailored to the types of mishaps most commonly faced by your family. Take some of those items from the drawers and cabinets, get a roomy bag to store it in and start stocking up on missing items you might need in an emergency.
Convert a Container to a Homemade First Aid Kit
As you start to gather supplies, the first thing you’ll want is someplace to put them. The type of container needed depends on want kind of DIY first aid kits you are building. If you are putting together supplies for quick access at home, plastic containers with easy-snap lids are a great option. You can stack lightweight containers almost anywhere, and clear containers provide an easy way to identify contents when you are in a hurry. As you start to accumulate more items, it might be a good idea to upsize to a four or five-drawer movable cart. This is a great place to keep first aid backups and other health and beauty products.
Your car or truck is a natural place to keep one of your DIY first aid kits. For this, you could use a large purse or box, but putting your supplies in a small bookbag wins you more cool points. It’s also a lot easier to grab quickly in an emergency or to carry with you when needed. Add labels to supplies and containers so that kids and friends can easily identify the first aid kit in an emergency.
If you work outdoors or in a place with potential hazards, consider packing a mini homemade first aid kit in a makeup bag.
For hiking and camping trips, be sure to include a durable bag and waterproof labeling. The American Red Cross sells Velcro badges with the red cross on a white background for those handy with a needle and thread. This can contain just a few essentials like band-aids, aspirin and anti-bacterial wipes. Teach children too young to read what the red cross symbol means, so they can help if someone gets hurt. This universal symbol is a great way to identify first aid kits in public places.
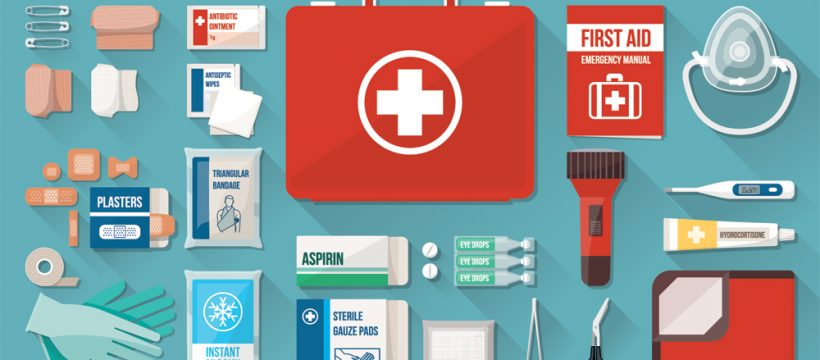
What to Include in Your DIY First Aid Kits
Invest in a good first aid book that’s easy to read. Read it. It doesn’t do you any good to compile a kit full of supplies you aren’t trained to use properly.
First aid book — It’s all well and good to buy items in a first aid kit. Learning how to properly clean and bandage a wound, administer over-the-counter pain relief medication and other steps to help someone you love deserves some research. Read the book, learn it, and practice it regularly.
- Variety of band-aid sizes
- Small pair of shears
- Alcohol prep wipes— Useful for cleansing wound sites prior to bandaging. You can also use it to sterilize thermometers, tweezers, and other tools in your kit.
- A thermometer— Make sure it’s easy to use
- Hydrogen peroxide to clean wounds
- Rubbing alcohol to reduce fevers
- Antibiotic ointment to prevent infection
- Small/medium/large gauze pads
- Medical tape
- Cotton balls
- Aspirin, Ibuprofen, and Acetaminophen — Before administering, try to find out if your victim is allergic to any of these. Keep in small bottles to save space.
- Tweezers and a sewing needle for pulling out splinters
- Non-latex gloves (2 or more pairs) NOTE: Avoid contact with blood and other bodily fluids to protect yourself and the person you are trying to help.
- Sterile saline wash to flush out wounds, eyes, and nasal cavities.
- CPR breathing mask to protect you while delivering CPR.
Outdoor First Aid Supplemental Items
So, now you have a pretty good idea of what to include in your DIY first aid kit. However, if you spend a lot of time outdoors, there are other items you’ll need to protect your family and treat mild ailments. If there’s a chance you could wander into poison ivy, be plagued by insects or even upset some wasps or bees, you should think big picture and include the following in your kit.
- Smelling salts, or ammonia capsules, come in handy if someone passes out
- Bee sting kit — This doesn’t take the place of an epi pen if you are allergic. Be familiar with the instructions prior to use.
- Baking soda — Mix it with plain water to create a remedy for a sour stomach or acid reflux.
- Calamine lotion— Relieves sunburn and itching from insect bites and poison ivy.
- Antidiarrheal pills — The necessity of this item is rather obvious.
- Elastic bandages — Select known brands such as ACE and choose sizes for your whole family.
- Paper bags — For hyperventilation.
- Razor blades — Can help when removing big splinters.
- Snake bite kit — Nature can be a lovely experience and wilderness camping, hiking and other family activities are a great way to get your kids interested in the great outdoors. However, there are dangers when working in an unknown environment. Prepare for the unexpected by keeping a snake bite kit available, along with other outdoor-only supplies.
Allergy Products to Include
You should carry with you a brief family history that includes allergies. This helps strangers, first responders and even friends determine if you are allergic or having an allergic reaction.
- Emergency Inhaler
- Benadryl
- EpiPens, or other emergency prescribed medication
Replace and Restock Expired Items
Ensure your homemade first aid kits are accessible in multiple locations in your home and garage. Remember that it isn’t just you that needs to know where to find supplies in a medical emergency. Making this a part of your family discussions is vital and helps prepare your children for emergencies in a cool and collected manner. Actually, it takes the mystery and fear out of the equation and teaches everyone the importance of preparedness. Also, if you are sitting with a hurt child or friend, you may need someone else to run for supplies in a hurry.
That brings us to restocking used supplies and replacing expired ones, where applicable. Mark a day on the calendar every couple of months to check your kits (all of them). You can print out the checklist from this article and keep it with each of the kits. Check for empty bottles of medicine and throw out anything older than six months. If there is no expiration date provided, it’s much wiser to spend a few dollars on replacements than to rely on questionable medication. While you are checking, it’s a convenient time to perform some sanitary maintenance. You should always sterilize tweezers, thermometers and scissors with peroxide or rubbing alcohol each time you use them.
Avoiding products with natural latex will ensure that products don’t peel or become unusable more quickly. Unfortunately, many people are allergic to latex and can have extreme allergic reactions if their skin comes into contain with gloves and other natural rubber products.
Where to Keep Your DIY First Aid Kits
If you walk into mechanics’ shops, manufacturing plants and warehouses, you find fully loaded first aid kits tacked onto the walls. That can involve unnecessary expense and installation time, not to mention it might not add much to your home décor. So, where can you keep them that’s convenient and safe and within reach of everyone’s hands? Here’s our suggestions:
- Under the kitchen sink
- In each bathroom, inside a cabinet or sink
- In the garage and one for each car (preferably in the glove box where even the kids can get it quickly.
Start with one centrally located kit and work your way up over time to spread the expense out. Remember that you don’t need full bottles of medicine in each kit. Rather, you can separate large bottles out into smaller, labeled containers, and share them between your different kits. Make sure to mark expiration dates on each label.
Budget DIY Kit
It isn’t necessary to spend a ton of money on your first aid kits. In fact, building your own first aid kits should save you money. The important thing is learning where to save and where not to skimp. For example, it you have someone in the family with asthma, you’ll want to keep quality inhalers as backups in at least a few of the kits in your home and cars.
That being said, there are many supplies that you can get from dollar stores to make an effective DIY first aid kit. Each of the following 22 items cost one dollar. Divide them up to make four separate kits.
- 4 rolls (10 yards) paper tape (1 per kit)
- 4 rolls (3 yards) sterile gauze (1 per kit)
- 4 tubes (.33 oz.) triple antibiotic ointment (1 per kit)
- 4 elastic bandage (1 for each kit) (1 per kit)
- 2 40-count bottles of ibuprofen (20 for each kit)
- 2 8-count vinyl gloves (2 pair for each kit)
- 1 box of 100 adhesive bandages (25 assorted for each kit)
- 1 pack of 20 pain relief patches (5 for each kit)
Other Cost-saving Ideas
- A large bottle of hydrogen peroxide can be split into two or four-ounce containers and costs about $1, or less than 0.25 cents per kit (with plenty to spare for refills and backup on your next inspection).
- You can get a big bag of cotton balls for $1 at the dollar store and put 10 to 15 in each kit and still have plenty to spare for backups.
- Get snap top bins at discount stores to keep your kits waterproof.
For less than $5 each, you have just built four reasonably effective first aid kits. It will clean wounds, relieve pain and so much more. You can start with this and add items over time or replace with pricier brands you prefer when your budget permits.
CPR Basics for an Adult Victim
As a bonus, here is a mini-refresher on performing CPR, the most common life-saving first aid technique. Remember, only certified individuals should attempt to perform CPR. Call 911 before beginning CPR. According to the American Red Cross:
- Place one hand on top of the other in the middle of the victim’s chest. Push hard and push fast for 100 reps per minute and about two inches deep.
- Tilt the person’s head back and lift the chin. Pinch the nose shut and place your mouth around the victim’s mouth to form a tight seal. Blow hard enough to make the chest rise. Deliver two breaths before resuming compressions.
- Continue CPR until the person begins to breath or 911 help arrives.
- Learn more CPR Basics
Conclusion
Creating DIY first aid kits is something you can involve the who family in. Reading the first aid book with kids can teach them valuable skills and show them what you are willing to do to keep them all safe and well.
Making your own kit, as discussed, lets you customize your homemade kits to account for health issues specific to your family members. For example, if you live in a warm climate, you might keep sunburn spray in every kit. In colder climates, you may want to store an extra blanket in your vehicle for winter emergencies.
With pre-bought kits, you often have no way to know if the medications are expired, that’s if you even get medications at all in the exorbitantly priced pre-packaged first aid kits. When you create your first kit, you will feel a sense of accomplishment and relief. Not only have you taken a valuable step toward keeping your family healthy, you now know exactly where each product came from and can rest assured that no items are expired.
Sources:
https://preparednessmama.com/diy-dollar-store-first-aid-kit/
https://www.redcross.org/take-a-class/cpr/perfoming-cpr/cpr-steps